We use cookies to improve your experience and our business. See our privacy/cookie policy or continue browsing to accept our use of cookies. View our cookie policy.

How to Install a Pizza Oven in Your Garden: Your Essential Guide
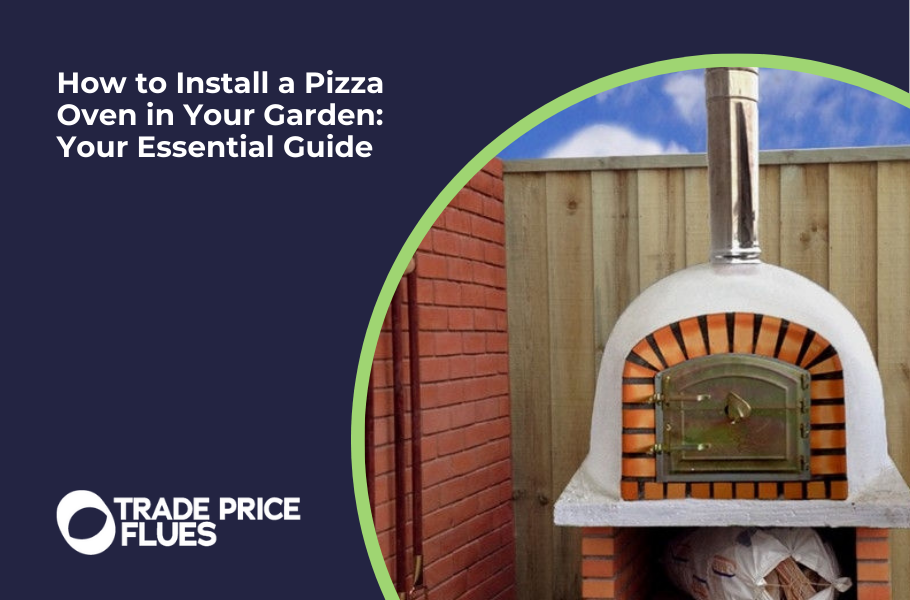
Summer is synonymous with sunshine, long evenings, and gathering with friends and family. What better way to improve those warm evenings than with the irresistible aroma and taste of authentic, homemade pizza, cooked to perfection in your very own garden pizza oven?
Installing a pizza oven might seem daunting, but with a bit of planning and the right know-how, you can transform your outdoor space into a pizzeria paradise. This guide will walk you through everything you need to consider, from choosing your oven to firing it up for that first delicious slice.
Selecting the right pizza oven

Before you can think about installation, you need to pick the oven that suits your needs, space, and budget. The main types include:
- Wood-Fired Ovens: The traditional choice, beloved for their smoky flavour. These ovens require more effort in terms of fire management and take longer to heat up, but the results are often considered second-to-none. They range from large, permanent masonry structures to smaller, prefabricated models.
- Gas-Fired Ovens: Offering convenience and control, gas pizza ovens heat up quickly and maintain temperature easily. While they don’t have the same distinct smoky flavour of a wood-fired oven, they are incredibly user-friendly. Many models offer wood chip trays to add some smokiness.
- Portable Ovens: Ideal for smaller spaces, renters, or those who want flexibility. These compact ovens (often gas or hybrid) can reach high temperatures quickly and are great for cooking one pizza at a time.
- Built-In Ovens: These are permanent installations, often integrated into larger outdoor kitchen setups. They offer a stunning visual appeal and become a true feature of your garden. However, they do require significant planning and construction.
Before you choose, consider factors like how many people, you’ll typically cook for, your preferred fuel source, the available space, and your budget.
Finding the perfect spot
Where you place your pizza oven is essential for safety, convenience, and performance.
- Safety First: Ensure ample clearance from combustible materials like fences, sheds, overhanging trees, and your house siding. Check the manufacturer’s specific clearance requirements.
- Convenience: Think about workflow. Placing the oven reasonably close to your kitchen or prep area makes transporting ingredients and finished pizzas easier.
- Wind and Weather: Try to find a spot sheltered from strong winds, which can affect temperature stability and smoke direction. Consider if you need protection from rain, especially for ovens with sensitive components or masonry that needs to stay dry.
Building a solid foundation
Your pizza oven needs a sturdy, level, and non-combustible base to stand on. The type of base depends on the oven’s size and weight.
- Portable Ovens: Often come with their own legs or can be placed on a sturdy metal or stone table.
- Heavier Prefabricated Ovens: May require a reinforced stand or a concrete/paving stone base.
- Built-In Masonry Ovens: Need a substantial, purpose-built concrete slab foundation designed to handle significant weight and heat. Proper insulation beneath the oven floor (using fire bricks and insulation board) is crucial for heat retention and cooking performance.
Always follow the manufacturer’s recommendations for the base requirements specific to your oven model.
Assembly and installation

Once you have your location and base sorted, it’s time for assembly. This varies greatly depending on the oven type. Portable ovens might just need legs attached, while built-in ovens can involve complex masonry work. For prefabricated models, carefully follow the manufacturer’s instructions. Ensure all components fit snugly, seals are tight (using high-temperature sealant where specified), and the structure is stable.
Understanding and installing the flue system
Proper ventilation is non-negotiable for performance and safety, especially with wood-fired ovens. The flue (or chimney) system vents smoke and hot gases away from the cooking chamber and creates the necessary draught for efficient combustion and airflow.
What is a flue extension kit?

A good draught pulls fresh air into the fire, feeding the flames for optimal heat, while simultaneously drawing smoke and combustion byproducts up and away from you and your cooking area.
Many pizza ovens come with a standard, relatively short flue section (often around 500mm). While adequate in perfect conditions, this can sometimes be insufficient. This is where a flue extension kit becomes essential.
A flue extension kit typically includes sections of high-quality stainless steel chimney pipe and connectors designed to increase the overall height of your pizza oven’s exhaust flue. They often come with a rain cap to prevent water ingress.
Why might you need a flue extension kit?
There are several reasons to get a flue extension kit for your pizza oven, including:
- Improved Combustion and Draught: Extending the flue height significantly enhances the natural draught (the “pull” of air through the oven). This leads to more efficient burning of fuel and better air circulation within the oven dome – key factors for achieving that perfectly crisp crust and evenly cooked toppings.
- Preventing Backdraughts: In windy conditions or if the oven is situated on uneven ground or near obstacles, smoke and heat can be forced back down a short flue. Raising the chimney’s exit point well above the oven helps prevent this annoying and potentially unpleasant issue.
- Clearing Obstructions: If you’ve integrated your oven into an outdoor kitchen structure, under a pergola, or near a roofline, a standard flue might not clear these obstructions adequately. A twin wall flue extension can be fed through the roof of a wooden structure. The ensures smoke is vented safely away from overhead structures and occupied areas.
Installing your flue extension kit
Adding an extension is usually straightforward, but precision and safety are key.
- Safety First: Ensure your pizza oven is completely cooled down if recently used. Flue components can get extremely hot.
- Clean the Connection Point: Use a damp cloth to wipe any soot, dust, or debris from the top of the existing oven flue outlet. A clean surface ensures a better, tighter seal.
- Retain the Original Flue Section: It’s generally recommended to keep the original flue piece that came with your oven, attached directly to the oven dome. This section often includes a crucial built-in damper (allowing you to control airflow and heat retention). The extension kit should then be added on top of this original piece.
- Assemble the Kit: Follow the specific instructions provided by the kit manufacturer. This usually involves stacking the pipe sections and ensuring the locking mechanisms or connectors between each section are fully engaged and secure. Fit the rain cap on the very top piece.
- Mount the Extension: Carefully lift the assembled (or first section of the) extension onto the oven’s existing flue outlet. It helps to have a second person support the extension’s weight and keep it steady. The pipe should slide smoothly into place and sit flush.
- Secure Connections: Continue adding sections if applicable, double-checking that each joint is firmly locked and sealed according to the instructions.
- Check Alignment and Stability: Once fully assembled, visually inspect the extension to ensure it sits perfectly vertical and feels stable and secure. You might mark its position against a nearby wall to easily monitor any future shifting.
- Maintain Clearances: Always adhere to local regulations and manufacturer guidelines regarding the required minimum distance (clearance) between the chimney pipe and any combustible materials (wood framing, siding, roofing, etc.) Ensure adequate ventilation around the entire flue system. A twin wall flue pizza oven extension kit reduces distance to combustibles to 70mm from the edge of the flue.
Essential Tools and Accessories
You’ll need the following to install your pizza oven and get it ready to fire up:
- Installation Tools: Level, tape measure, work gloves, safety glasses. For built-in ovens, you’ll need masonry tools (trowel, mortar mixer, etc).
- Cooking Accessories: Pizza peel (for launching pizzas), turning peel (smaller, for rotating pizzas), infrared thermometer to check floor temperature, heat-resistant gloves, ash rake/shovel, and a stiff brush for cleaning.
The curing process
This step is critical for new masonry or refractory cement pizza ovens. It involves building a series of small, progressively larger and hotter fires over several days. This process slowly drives out residual moisture trapped within the oven materials during manufacturing and shipping. Skipping this can cause thermal shock, leading to cracks when the oven is heated rapidly for the first time. Follow your manufacturer’s specific curing schedule meticulously – patience here protects your investment.
Ready to roll (the dough)!
Installing a pizza oven is a rewarding project that promises countless evenings of delicious food and fun. By carefully considering your oven choice, location, foundation, and especially the flue system (including extensions where needed), and by following safety procedures and the crucial curing process, you’ll be well on your way. Get ready to gather your favourite toppings, perfect your dough recipe, and fire up a summer full of incredible homemade pizza!