We use cookies to improve your experience and our business. See our privacy/cookie policy or continue browsing to accept our use of cookies. View our cookie policy.

What Is a Super Flex Chimney Liner? Full Guide & Benefits
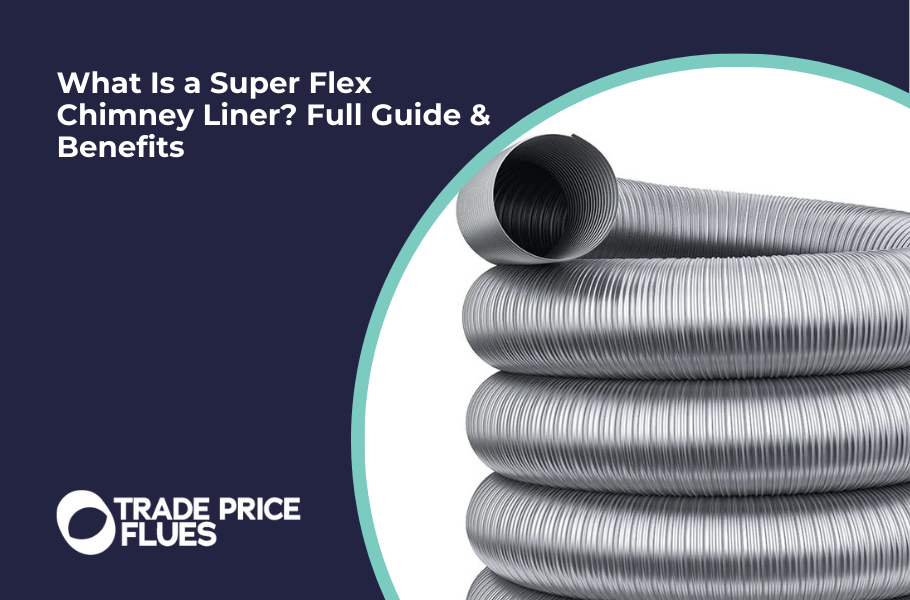
Imagine enjoying the warmth of your stove or fireplace on a cold evening, completely confident that your home and family are safe. This peace of mind begins with a component you might not even see: the chimney liner. An old, damaged, or non-existent liner is a serious hazard. A high-quality system like Super Flex is the definitive solution.
If you’re looking to install a new stove, upgrade an old fireplace, or simply guarantee your heating system is safe and efficient, this guide is for you. Discover why Super Flex’s flexible stainless steel chimney liners are the industry-leading choice for protecting your home.
Why Your Chimney Needs a High-Quality Liner: The Critical Safety Barrier
A chimney liner is a flexible or rigid tube that fits inside your existing masonry chimney. It serves one primary, crucial function to safely channel dangerous combustion byproducts (like smoke, exhaust gases, and creosote) from your appliance out of your home.
Many older homes have chimneys with clay tile liners that are cracked and deteriorated, or worse, have no liner at all. This poses two major risks:
- Carbon Monoxide Poisoning: Cracks in the chimney structure can allow this odourless, colourless gas to leak into your living spaces. Carbon monoxide poisoning is a silent threat that claims dozens of lives in the UK each year and can cause severe, long-term health problems.
- Chimney Fires: When wood or solid fuel burns, it produces creosote, a highly flammable substance. Creosote can build up on rough masonry surfaces. A spark can ignite this buildup, leading to a devastating chimney fire that can spread to the rest of your house.
A smooth, sealed, and properly installed stainless steel liner like Super Flex prevents chimney fires, keeps carbon monoxide contained, and protects your chimney’s masonry from corrosive byproducts, extending its life. It’s not just an upgrade; it’s an essential safety system.
Introducing Super Flex: The Gold Standard in Chimney Liners
Super Flex flexible chimney liners are engineered from premium 316 or 904 grade stainless steel, designed to withstand extreme temperatures and resist corrosion for a lifetime. Their flexible design allows them to be easily installed in virtually any chimney, navigating bends and offsets without issue.
The patented manufacturing process creates a uniquely smooth inner wall with no lips, folds, or seams. This flawless surface prevents creosote from gaining a foothold, making cleaning easier and drastically reducing the risk of blockages and fires.
Key Features & Benefits at a Glance
Super Flex delivers unmatched safety and performance. Here’s why it stands out:
- Superior Safety: The seamless inner layer and gas-tight construction provide a complete barrier, protecting your family from carbon monoxide leaks and chimney fires.
- Enhanced Efficiency: The smooth bore allows for optimal airflow (or ‘draw'), helping your stove burn more efficiently, produce more heat, and use less fuel.
- Unmatched Durability: Constructed from two layers of premium 316 or 904 stainless steel, it is incredibly resistant to corrosion, heat, and abrasion during installation.
- Easy Maintenance: The ultra-smooth inner surface resists creosote buildup and makes annual sweeping faster and more effective.
- Versatile Installation: Thanks to its unique multidirectional design, Super Flex can be installed from the top down or the bottom up, simplifying the process for installers.
- Fully Certified: Super Flex is HETAS-approved and UKCA marked, meeting the highest EU and UK standards (EN 1856-2 T600) for temperature, strength, and corrosion resistance. This guarantees compliance and quality.
- Custom Fit: Available in lengths from 1 to 30 metres, it can be ordered to fit your chimney perfectly, minimising joints and potential weak points.
Is Super Flex Right for Your Home? Approved Applications
With its T600 temperature rating, Super Flex is certified for a wide range of appliances and fuels. It is the recommended choice for lining masonry chimneys connected to:
- Solid Fuel Stoves & Cookers
- Wood-Burning Stoves & Fireplace Inserts
- Wood Pellet Stoves
- Gas Fireplaces & Heaters
- Oil-Fired Boilers & Cookers
- Condensing Boilers
It is approved for burning seasoned wood, kiln-dried logs, and all HETAS-approved smokeless fuels.
The Super Flex Installation Process: A Guide for the Confident DIYer
Installing a flexible chimney liner is an intermediate-to-advanced DIY project that can be incredibly rewarding. With careful planning, the right tools, and a focus on safety, you can successfully install a Super Flex liner yourself.
Crucial Disclaimer: This is a safety-critical job. Always read and follow the official Super Flex installation manual provided with your liner. You are responsible for ensuring your installation complies with local building regulations (in the UK, this is Document J). If you are ever in doubt, stop and consult a professional.
Before You Begin: Essential Preparation
- Safety First: You will be working at height and handling sharp metal. Ensure you have a secure ladder or scaffolding, a roof harness, safety glasses, and heavy-duty gloves. An extra person is essential for safety and for guiding the liner.
- Gather Your Tools: You will likely need a dust sheet, chimney sweeping rods and brush, a powerful drill, masonry bits, a cutting knife, hacksaw, or angle grinder with a metal cutting disc, a tape measure, rope, and a nose cone for the liner.
- Check the Chimney: Before ordering your liner, ensure the chimney is structurally sound and clear of any major obstructions, like old damper mechanisms or severe bends that may need to be knocked out.
Step-by-Step DIY Installation Guide
- Step 1: Thoroughly Sweep the Chimney: This is non-negotiable. The chimney must be completely clean of all soot and creosote before you begin. Any remaining creosote is a fire hazard. Sweep it until no more debris falls.
- Step 2: Measure Twice, Cut Once: Measure the full length of the flue from the top of the stove to the top of the chimney pot. Add at least 500mm (0.5m) to this measurement to ensure you have enough liner to work with at both ends. The liner diameter should match your stove’s flue outlet (e.g., a 5-inch stove outlet requires a 5-inch liner).
- Step 3: Prepare the Liner: Carefully uncoil the liner on a flat, protected surface. Attach a ‘nose cone’ to the end of the liner you will be feeding down the chimney – this helps it navigate bends without snagging. Securely tie a long, strong rope to the nose cone.
- Step 4: Feed the Liner into the Chimney: The easiest method is a top-down installation. One person goes onto the roof and carefully lowers the liner (with nose cone first) down the chimney. The second person stays below, helping to guide the rope and liner through the fireplace opening, ensuring it doesn’t bunch up or get kinked. Super Flex’s multidirectional design means you can install it from the bottom up if access is easier, but top-down is generally recommended.
- Step 5: Connect the Liner at the Bottom: Once the liner is through, pull enough through to comfortably connect it to your stove. Use the appropriate liner-to-stove-pipe adapter. Secure it tightly according to the manufacturer’s instructions, often using fire cement and a clamping band to create a perfect gas-tight seal.
- Step 6: Secure the Top of the Liner: Back on the roof, pull the liner taut (but don’t stretch it). Cut the excess liner so it finishes just above the top of the chimney stack. Install the top plate and top clamp to hold the liner in place, then fit the hanging cowl. This secures the liner and prevents rain, birds, and debris from entering the flue.
- Step 7: Insulate the Void (Highly Recommended): To achieve the best performance from your stove, you should insulate the gap between the new liner and the old chimney walls. You can do this by pouring loose-fill vermiculite or perlite down from the top. This keeps the flue gases warm, improves the stove’s draw, and dramatically reduces creosote buildup.
- Step 8: Final Checks and Commissioning: Before lighting your first fire, perform a smoke test. With the stove connected, light a smoke pellet inside the stove with the door closed. Check all joints at the stove and the top of the chimney for any signs of smoke leakage. If you see any, you must fix the seal before using the appliance.
By taking your time and following each step methodically, you can achieve a professional-quality installation and enjoy the safety and efficiency of your new Super Flex system.
Maintaining Your Super Flex Liner for a Lifetime of Safety
With proper care, your Super Flex liner will provide decades of safe operation. Follow these maintenance tips:
- Annual Professional Sweep: Have your chimney and liner swept at least once a year by a qualified chimney sweep – more often if you burn wood frequently.
- Regular Inspection: During the sweep, ask the professional to inspect the liner, connections, and cowl for any signs of damage or corrosion.
- Burn Smart: Only use approved fuels. Burning unseasoned (wet) wood or household rubbish can cause rapid creosote buildup and damage the liner.
- Check Your Cap: Ensure the rain cap/cowl is secure and free of debris to prevent blockages and water damage.
Invest in Your Safety and Comfort: Choose Super Flex
A high-quality chimney liner is not a luxury – it is a fundamental part of a safe and efficient modern heating system. By choosing Super Flex, you are investing in superior engineering, certified safety, and lasting peace of mind.
Ready to make your home safer and warmer? Order your Super Flex liner and components today and get started on your installation.
Frequently Asked Questions (FAQ)
How do I choose the right diameter for my liner?
The rule is simple: the liner’s internal diameter must be at least the same size as your stove’s flue outlet collar. For example, if your stove has a 6-inch (150mm) outlet, you must use a 6-inch liner. You can go larger, but never smaller. In the UK, for a modern DEFRA-exempt stove, the minimal liner diameter is 5 inches (125mm). For an open-fire or a non-exempt stove, the minimum is typically 8 inches (200mm). Always check your stove’s manual and Document J of the building regulations.
Is insulating the liner really necessary?
While not strictly mandatory in all situations, it is highly recommended and considered best practice. Think of insulation as a warm coat for your flue. It keeps the flue gases hot all the way to the top. This has three major benefits:
- Improved Draw: Hot air rises faster, creating a stronger, more consistent draw for your stove.
- Reduced Creosote: Hotter gases prevent the condensation that forms dangerous creosote, reducing fire risk and making cleaning easier.
- Increased Efficiency: A better draw means your stove burns fuel more completely and efficiently.
For the small additional cost of vermiculite or a rockwool sleeve, the performance and safety benefits are enormous.
What’s the difference between 316 and 904 grade stainless steel?
Both are high-quality grades, but they have different levels of corrosion resistance.
- 316 Grade: This is the industry standard and is excellent for burning seasoned wood, kiln-dried logs, and occasional use of smokeless fuels. It’s suitable for the vast majority of installations.
- 904 Grade: This is a premium grade with higher chromium and nickel content, offering superior resistance to the corrosive acids produced by burning high-sulphur smokeless fuels. If you plan to primarily burn smokeless coal, or you want the longest possible lifespan for your liner, 904 grade is the best investment.
As a DIYer, do I need to get my installation certified?
Yes. A solid fuel appliance installation is ‘controlled work’ under UK Building Regulations. You have two legal routes:
- Use a Competent Person: Hire a HETAS registered installer who can self-certify their own work.
- DIY Route: You can do the work yourself, but you must notify your Local Authority Building Control (LABC) department before you start. They will arrange for inspections at key stages (e.g., after the liner is installed but before it’s all closed up) and will issue a certificate of compliance upon satisfactory completion. This is crucial for home insurance and when you sell your property.
My chimney has a few bends in it. Is that a problem?
Flexible liners like Super Flex are specifically designed to handle bends. However, building regulations (Document J) state that a chimney flue should have no more than four bends, with no single bend being more than 45 degrees from the vertical. If your chimney has a very sharp, near-90-degree bend (common in older houses), you may need to knock through the brickwork at that point to help guide the liner around it.
How do I cut the stainless steel liner to the correct length?
For the best results and the easiest process, use our flue cutting knife.
Alternatively, you can use a small angle grinder with a thin metal-cutting disc. Mark your cutting line clearly around the circumference. Wear heavy-duty gloves and safety glasses, as the cut edge will be extremely sharp. A sharp, fine-toothed hacksaw can also be used, but it will require significantly more effort.
How long does a Super Flex liner last?
Super Flex liners are made from high-grade stainless steel and come with a manufacturer’s warranty, designed to last for many years with proper installation and maintenance. The exact lifespan depends on the grade (316 vs. 904) and the types of fuel you burn.
Will a liner improve my stove’s performance?
Absolutely. A correctly sized and insulated liner create a strong, consistent draw, which helps your stove light easier, burn cleaner, and produce more heat from the same amount of fuel.
Is installing a chimney liner expensive?
It’s an investment in your property’s most important asset: its safety. The cost is minor compared to the potential cost of repairing damage from a chimney fire or the priceless value of protecting your family from carbon monoxide.