We use cookies to improve your experience and our business. See our privacy/cookie policy or continue browsing to accept our use of cookies. View our cookie policy.
403 Forbidden
ERR_WEB_NGX_403

After 2020 became the year of ‘working from home’, we noticed a huge new number of queries come flooding in, asking; “how can I fit a flue in my shed or outhouse?”
Yes, as we tackled DIY projects and sought to expand our living spaces away from homeschooling and kitchen table hotdesking, one thing became clear - now has never been a better time to make the most of our outdoor spaces!
So, are you wondering whether you can fit a wood burner in your shed? Or do you have a new pop-up home office in your garden that’s in need of heating up?
Read our guide to find out how to install a stove and flue in it now!
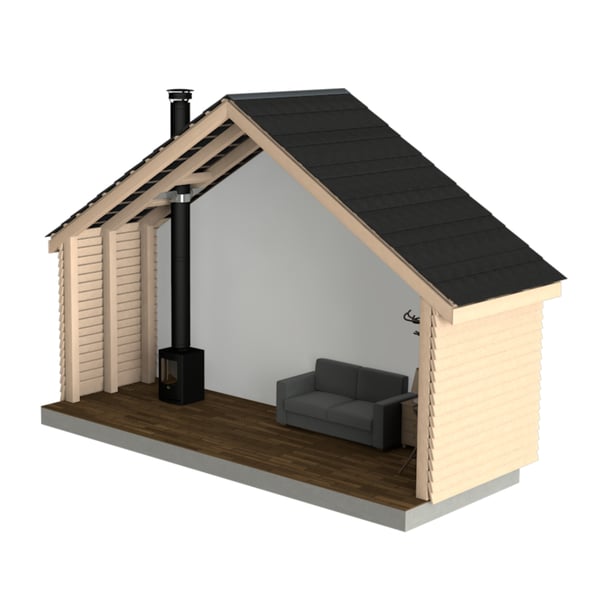
Putting a wood burner in a garden shed or outhouse is not only possible, but a fantastic idea.
Here in the UK, even our summer nights can turn chilly. And, when it comes to winter, enjoying your outdoor living spaces becomes highly impractical as you have to layer yourself up just to get some fresh air!
Installing a wood burner is therefore becoming an incredibly popular way for us Brits to make the most of our gardens. Cosy up and enjoy the ambience of the outdoors for as long as your fire is crackling away!
Naturally, you may have concerns around the safety of installing a wood burning stove in a wooden building.
And you are right to do so - high temperatures combined with flammable materials aren’t something to take lightly.
For this reason, it is absolutely essential that you use the correct parts and follow all safety precautions when installing your stove and flue. If you aren’t sure what you are doing, we highly recommend asking a HETAS certified installer to do the job for you.
So, you now probably want to know what you need to install a stove in a shed, outhouse or other wooden building.
To make things easy for you, here at Trade Price Flues we have put together a fantastic value single story garden shed flue kit which includes all the parts necessary to fit your wood burner!
Find out more about how you can use it for your shed or outhouse below...
First of all, you should be aware that the only safe way to install a wood burner in a shed is to use a twin wall flue system.
This is because twin wall flue pipe is highly insulated to prevent its exterior from reaching dangerously high temperatures. In fact, twin wall flues are designed exactly for the purpose of being placed through ceilings and walls where there is no traditional chimney present.
However, remember that while twin wall flue is highly insulated, you still need to follow the correct distance to combustible requirements.
As for any other rules to abide by, you should follow the same twin wall flue regulations as you would when installing one in your house. This means making sure you follow all precautions listed in the approved Document J and the UK’s BS 8303 standards.
Along with twin wall flue pipe, you might be wondering what else you need to install your wood burner in a shed.
Our garden shed flue kits also contain:
- Twin wall adapter
- Rain cap
- Roof support
- Dektie Eazy Seal flashing
- Storm collar
- Locking bands
- Wall support
Along with any extras such as fire cement and silicone and a carbon monoxide alarm, these parts should be everything you need to complete your installation.
A question we find many people ask when considering putting a stove in their shed is how to fit the flue through the roof.
However, this really doesn’t have to be terribly complicated!
Once you have your wood burner safely in position, use an adaptor to connect your twin wall pipe to your stove or stove pipe.
Then, mark a circle above it where your flue will go through the ceiling. Remember, you not only need enough space for the diameter of the flue. You also need to add on the required distance to combustibles.
Once you have your hole marked out, cut the hole out with a jigsaw. You can then use the roof support and wall support in our flue kit to secure the flue in place.
Next, you can head out to the roof of your shed. Take your Dektie Eazy Seal flashing and push your secured flue pipe through it. Fix it in place using some fireproof silicone sealant and drilling screws through the flange.
You can then attach your storm collar and rain cap to finish off.
For more advice, we have a whole article on how to install twin wall flue through a ceiling or wall.
Another common concern with installing a stove in smaller wooden buildings is how high the flue needs to be.
Typically, it is advised that external flues be at least 4.5 metres in length when measured from the top of the stove to the top of the pipe. This is to ensure that your stove has sufficient draft to work efficiently.
However, for buildings like sheds, summerhouses and outhouses, this isn’t always possible. It might be that you don’t have enough wall to attach the flue to in order to keep it secure.
In these cases, you might be able to use a guy wire bracket to offer some support. If this isn’t possible, it is still often fine to have a chimney as short as 3.5 metres when using a well insulated twin wall flue pipe.
Contact us at Trade Price Flues today for some friendly help on building your twin wall flue system!
Don’t forget to check out our Single Storey Shed or Outhouse Flue Kit or see all of twin wall flue parts for more.
We have even more advice on installing your flue on our blog…
Everything You Need to Know About Chimney Flashing | What is a Twin Wall Flue System | Do You Need a Chimney Cowl on Your Chimney?


